Nintendo switch joy con controller left fix foam – Nintendo Switch Joy-Con controller left fix foam sets the stage for a comprehensive guide to repairing drifting issues. This in-depth look explores various fix foam solutions, troubleshooting steps, and alternative repair options to get your left Joy-Con back in tip-top shape. We’ll cover everything from identifying the symptoms of a malfunctioning left Joy-Con to detailed instructions on applying the foam for optimal results.
Understanding the different types of drift, from stick drift to button sticking, is crucial to selecting the right fix. This guide will also discuss preventative measures to help extend the life of your Joy-Cons and keep them performing flawlessly.
Controller Issues and Symptoms
Nintendo Switch Joy-Con controllers are beloved for their portability and versatility, but unfortunately, they can experience malfunctions. Understanding the various symptoms of a malfunctioning left Joy-Con is crucial for effective troubleshooting and potential repair. This section details common issues, their manifestations in gameplay, and varying degrees of severity.Left Joy-Con issues often stem from mechanical wear and tear, particularly the delicate internal components that enable precise control.
This can manifest in a variety of ways, from subtle annoyances to completely debilitating gameplay experiences. Accurate identification of the problem is the first step towards resolution.
Joy-Con Drift
Joy-Con drift, a common issue, is characterized by unintended input. The analog sticks, responsible for directional control, may register movement even when the user’s hand is still. This can cause unexpected character movement or selection, significantly impacting gameplay. Drift can range from minor inconsistencies to severe, constant input, which can make precise control impossible.
Button Sticking
Buttons may also malfunction, sticking in a pressed or released state. A button that remains pressed, even after the user releases it, can lead to continuous actions, while a button that refuses to register input can render a crucial action unavailable. This issue can greatly impede gameplay, especially in fast-paced or button-heavy games.
Other Potential Issues
Beyond drift and sticking, other malfunctions can arise. The left Joy-Con’s connection to the console can sometimes fail, resulting in intermittent or no input at all. Similarly, the rumble feature, if present, might stop working, or exhibit erratic patterns. These issues often require closer inspection of the controller’s physical state and connection to ensure proper functioning.
Severity Comparison
The severity of Joy-Con malfunction varies greatly. Minor drift, impacting only specific actions, may be easily tolerated in certain games. However, consistent or widespread drift, causing constant, unintended input, drastically impacts gameplay, requiring immediate attention. Likewise, a stuck button can be problematic, but the severity depends on the frequency and context of the sticking action.
Symptom Table
| Symptom | Description | Severity |
|---|---|---|
| Stick Drift | Unintended movement of the analog stick, registering input even when the stick isn’t moved. Can range from slight inconsistencies to continuous, erratic movement. | Minor (slight inconsistencies) to Severe (constant, unpredictable movement) |
| Button Sticking | A button remains pressed even after the user releases it, or a button fails to register input. | Minor (occasional sticking) to Severe (consistent sticking, hindering critical actions) |
| Connection Issues | Intermittent or complete loss of input from the Joy-Con. | Moderate (intermittent connection) to Severe (constant disconnection) |
| Rumble Issues | Erratic or non-functional rumble motor. | Minor (minor irregularities) to Moderate (inconsistent rumble) |
Foam Fix Solutions and Methods: Nintendo Switch Joy Con Controller Left Fix Foam
The Nintendo Switch Joy-Con controllers are renowned for their portability and versatility, but they can be prone to drifting or other input issues, particularly on the left Joy-Con. A common solution to these problems is using specialized foam inserts to improve the stick’s functionality. This guide delves into the different types of foam solutions, their respective pros and cons, implementation procedures, and comparative effectiveness.Different foam solutions address the issue of stick drift and improve the accuracy of input.
I’ve been wrestling with a wonky Nintendo Switch Joy-Con left controller lately. Finding the right fix foam to get it back to perfect functionality has been a real quest. Meanwhile, it’s fascinating to see how companies like DJI are branching out, getting into e-bikes. dji is getting into e bikes Hopefully, this new focus on innovative designs will translate into a great solution for my controller, too.
Maybe a new fix foam is on the horizon!
Choosing the right foam depends on the specific issue and the user’s desired level of intervention. The effectiveness and longevity of each foam type vary, requiring careful consideration before implementation.
Available Foam Fix Solutions
Various foam solutions are available for addressing left Joy-Con issues. These solutions range from simple, readily available options to more intricate and potentially more durable choices. Understanding the characteristics of each type is crucial for making an informed decision.
Types of Fix Foam
Different foam types cater to various needs and preferences. Each offers a unique approach to improving the Joy-Con’s performance, impacting the effectiveness and longevity of the fix.
- Silicone Foam: Silicone foam is a popular choice due to its flexibility and resilience. It conforms well to the Joy-Con’s internal structure, providing a secure fit. Its flexibility helps maintain precise control while playing. The relatively low cost of silicone foam makes it a budget-friendly solution. However, its elasticity might lead to some minor slippage over time.
- Elastomer Foam: Elastomer foam is a durable option known for its exceptional resilience and ability to maintain its shape. It provides a stable and consistent response, ensuring that the Joy-Con’s analog sticks function reliably. This foam type is a bit more expensive than silicone foam, but its extended lifespan makes it a worthwhile investment. The more rigid nature of elastomer foam can sometimes feel less responsive to very fine movements compared to silicone foam.
- Custom-Molded Foam: Custom-molded foam solutions are often the result of a 3D printing process, allowing for a precise and personalized fit. These solutions are tailored to the exact contours of the Joy-Con, potentially maximizing the effectiveness of the fix. The high degree of customization results in a very snug fit. However, the cost of creating a custom-molded solution can be significantly higher compared to other options.
I’ve been wrestling with a wonky Nintendo Switch Joy-Con controller lately. The left one’s drifting, making it a real pain to play games. I’m looking into fix foam solutions, but it seems like there are a lot of different options out there. Interestingly, a recent poll on poll responses still using lg phones revealed a surprising number of people still loyal to LG phones, which got me thinking about the enduring popularity of certain tech despite some issues.
Regardless, I’m hoping this fix foam will get my Switch controller working like new again.
Step-by-Step Procedure for Implementation
The procedure for installing each foam type is unique, but generally involves careful removal of the Joy-Con’s internal components, application of the foam, and reassembly. Following the manufacturer’s instructions is critical for ensuring a proper fit and preventing damage to the Joy-Con.
Comparison of Foam Types
| Foam Type | Pros | Cons | Durability |
|---|---|---|---|
| Silicone Foam | Flexible, relatively inexpensive, conforms well | Can slightly slip over time, less durable | Moderate |
| Elastomer Foam | Durable, resilient, maintains shape well | Can feel less responsive to fine movements, more expensive | High |
| Custom-Molded Foam | Precise fit, tailored to the Joy-Con | High cost, requires 3D printing or professional service | High (dependent on quality and material) |
Troubleshooting and Prevention

Fixing your Joy-Con drift with foam is a great DIY solution, but proper application and preventative measures are key to long-term success. Ignoring these steps can lead to reoccurring issues and frustration. This section will detail common mistakes, preparation methods, and essential preventative maintenance to keep your Joy-Cons in tip-top shape.Understanding the process of applying the foam, and more importantly, the correct way to prepare the Joy-Con, is crucial to avoid further damage or the failure of the repair.
Proper preparation and preventative measures are your best defense against recurring issues, saving you time and frustration in the long run.
Common Mistakes During Foam Application
Incorrect foam application can negate the effectiveness of the repair. Carelessness in applying the foam, using the wrong type, or not properly preparing the Joy-Con can lead to the foam not adhering correctly, or worse, causing further damage. Misjudging the amount of foam needed can also result in an overly thick layer, interfering with the functionality of the controller.
Preparing the Joy-Con for Foam Application
Thorough preparation is essential for a successful foam fix. Before applying any foam, thoroughly clean the Joy-Con’s contact points. Dirt, dust, and debris can prevent the foam from adhering properly and lead to premature failure. Using a soft cloth and a mild cleaning solution (or isopropyl alcohol) will effectively remove any residue, ensuring a clean surface for the foam.
It’s also important to carefully examine the Joy-Con for any pre-existing damage that could be exacerbated by the foam application. This will ensure the repair process doesn’t worsen any existing problems.
Necessary Tools and Materials
A well-stocked toolbox is crucial for this process. Essential tools include a soft cloth for cleaning, isopropyl alcohol (or a similar mild cleaning solution), and a pair of tweezers or small tools for precise foam application. The specific type of foam will depend on the Joy-Con model, but most repairs use a flexible, slightly tacky foam that adheres to the contact points.
Ever had a Nintendo Switch Joy-Con drift issue? I recently tried some fix foam for the left Joy-Con, and it’s actually been pretty effective. While researching different solutions, I stumbled upon news about a new TikTok notes app, a soft launch, which is interesting. TikTok’s Notes app soft launch is certainly something to keep an eye on, but ultimately, I’m glad I found a solution for my drifting Joy-Con issue.
This fix foam seems to be doing the trick for now. Hopefully, it will last.
The right tools and materials will save time and reduce the risk of damaging the controller. Ensure all tools are clean and ready to avoid contamination or cross-contamination.
Preventative Measures to Avoid Future Joy-Con Issues
Preventative maintenance is key to prolonging the lifespan of your Joy-Cons. Regular cleaning, proper handling, and mindful use are vital for preventing future drift issues. Avoid excessive force or dropping the controller, as this can cause damage to internal components. Playing in extreme temperatures, or storing the controller in such environments, can also contribute to issues. Consider investing in a protective case or carrying pouch to further shield the Joy-Con from external impacts.
Maintaining Joy-Cons for Longevity, Nintendo switch joy con controller left fix foam
Maintaining your Joy-Cons is crucial for long-term functionality. Regular cleaning and careful handling are key to preventing the accumulation of dust, debris, and residue that can lead to drift issues. Storage in a cool, dry environment and avoiding extreme temperatures will also extend the life of the Joy-Cons. Regularly checking the controller’s functionality will allow you to address any issues before they escalate.
Following a preventative maintenance schedule will greatly enhance the longevity of your Joy-Cons.
Preventative Maintenance Tips for Joy-Cons
- Regularly clean the Joy-Con contact points with a soft cloth and a mild cleaning solution (like isopropyl alcohol) to remove dust and debris.
- Handle the Joy-Cons gently to avoid accidental drops or impacts that could damage internal components.
- Store the Joy-Cons in a cool, dry environment to protect them from moisture and extreme temperatures.
- Avoid playing in extreme temperatures or exposing the Joy-Cons to direct sunlight.
- Use a protective case or carrying pouch to safeguard the Joy-Cons from external impacts and scratches.
- Periodically test the functionality of the Joy-Cons to identify any potential issues early on.
Alternative Repair Options
Foam padding is a popular, often effective, and relatively inexpensive solution for Joy-Con drift. However, it’s not the only option. Other approaches, ranging from simple DIY fixes to professional repairs, offer varying degrees of success and cost-effectiveness. Understanding these alternatives allows you to make an informed decision based on your specific needs and budget.
Beyond Foam: Other Joy-Con Repair Strategies
Beyond the common foam padding method, several other avenues for addressing a faulty Joy-Con exist. These solutions cater to different levels of technical proficiency and budget constraints. Some involve DIY modifications, while others necessitate professional intervention.
DIY Repair Alternatives
Several DIY methods exist for tackling Joy-Con drift, although their success rates vary significantly. Some users report success with soldering or adjusting the internal components of the Joy-Con, but this often requires technical skills and can void warranties. A common DIY approach involves using specialized lubricant or cleaning solutions to potentially restore functionality. However, improper application or excessive force could damage the Joy-Con further.
Professional Repair Services
For users seeking a more assured repair, professional repair services for Nintendo Switch Joy-Cons are available. These services often utilize specialized tools and techniques to diagnose and resolve the issue. Professional repair technicians possess the knowledge and experience to safely and effectively address the root cause of Joy-Con drift, often beyond the scope of DIY solutions. This approach generally guarantees a more reliable long-term fix.
Contacting a Professional Repair Service
Before contacting a professional repair service, it’s crucial to gather specific details about the Joy-Con issue. Document the symptoms and any troubleshooting steps you’ve already taken. Communicating these details to the repair technician will expedite the diagnosis and repair process. When contacting a repair service, inquire about their pricing structure, turnaround time, and warranty on the repairs.
Read reviews and compare pricing from various services to find the best fit for your needs.
Cost-Effectiveness Comparison
| Repair Option | Cost | Time | Effectiveness |
|---|---|---|---|
| Foam Padding | Low (under $10) | Quick (few minutes) | Moderate to High (depending on the severity of drift) |
| DIY Lubrication/Cleaning | Low (under $10) | Moderate (30 minutes – 2 hours) | Variable (requires technical skills, may not resolve the issue permanently) |
| Professional Repair | Moderate to High (over $20) | Moderate to Long (2-7 days) | High (generally more effective and permanent) |
The table above provides a simplified comparison of different repair options. Consider your technical expertise, budget, and desired repair duration when making a decision. Professional repairs are often the most effective but most costly, while DIY methods can be cost-effective but require more time and technical skill.
Deep Dive into Foam Application
Applying the right amount of foam to your Joy-Con is crucial for effective drift prevention and long-term controller health. Proper placement is key to achieving the desired outcome. This section will guide you through the meticulous process, ensuring your Joy-Con is back in optimal playing condition.
Foam Application Procedure
This procedure details the step-by-step application of foam to the Joy-Con, emphasizing precision and accuracy. Following these instructions ensures optimal results and prevents accidental damage to the controller.
- Preparation is Paramount: Thoroughly clean the Joy-Con surface with a lint-free cloth and isopropyl alcohol. Removing dust and debris is essential for ensuring proper foam adhesion and preventing future issues. This step eliminates any obstacles that might hinder the foam’s effectiveness.
- Foam Selection and Sizing: Select foam specifically designed for Joy-Con controllers. Ensure the foam pieces match the intended areas for application. Using the correct size is crucial for a snug and effective fit. Incorrect foam size can lead to uneven pressure and potentially damage the controller.
- Precise Placement: Identifying the Drift Zone: Carefully inspect the Joy-Con’s analog stick area. Identify the specific areas that are prone to drift—usually, the top and bottom portions of the stick’s housing. Applying foam in these specific areas is crucial. Improper application can leave areas exposed to friction and increase the risk of further drift.
- Applying the Foam: Gently place the foam piece over the identified drift-prone areas, ensuring it’s centered and snug. Avoid applying excessive pressure, as this can damage the Joy-Con’s internal components. Avoid applying foam to any other areas than the specified zones.
- Securing the Foam: Once the foam is in place, use a small amount of adhesive or super glue to secure it in place. This prevents the foam from shifting or detaching during gameplay. Apply the adhesive carefully and only to the foam itself, not to the controller surface.
- Testing the Fix: Carefully test the analog sticks to confirm that the foam is adequately reducing drift. If the drift persists, re-evaluate the foam application, checking for proper placement and ensuring the foam is not interfering with the stick’s movement.
Key Areas for Foam Application
Identifying and addressing the precise areas of the Joy-Con is critical for effective drift prevention. These areas experience the most friction, leading to the majority of drift issues.
- Analog Stick Housing: Applying foam to the top and bottom of the analog stick’s housing is crucial for reducing friction and preventing drift. These areas are most likely to come into contact and cause drift.
- Button/Trigger Areas: If buttons or triggers are contributing to drift, applying a thin layer of foam to the interior of these areas can help alleviate the issue. This foam reduces the contact pressure and movement.
- Trigger Housing: If trigger drift is a concern, consider applying foam to the trigger housing, paying close attention to the trigger’s interior surface.
Tools and Their Usage
- Isopropyl Alcohol: Clean the Joy-Con surface using a lint-free cloth and isopropyl alcohol to eliminate any dirt or debris, promoting optimal foam adhesion. This will prevent the foam from not adhering properly and increase its effectiveness.
- Lint-Free Cloth: Use a lint-free cloth to apply the isopropyl alcohol and clean the surface of the Joy-Con. This will avoid scratches and ensure a smooth surface for the foam.
- Foam Pieces: Select the appropriate foam pieces for the Joy-Con, ensuring a proper fit and covering the drift-prone areas. Using the right foam is essential for the fix.
- Adhesive or Super Glue (Optional): Use a small amount of adhesive or super glue to secure the foam pieces, preventing them from shifting during use. This is an extra step to ensure the foam stays in place.
Joy-Con Foam Application Illustration
Imagine a Joy-Con controller. A thin layer of foam is applied to the top and bottom of the analog stick housing, providing a smooth surface and reducing friction. Additionally, a small piece of foam is placed on the interior of the button/trigger areas, reducing the pressure and motion. This illustration highlights the key areas where foam application is critical for optimal results.
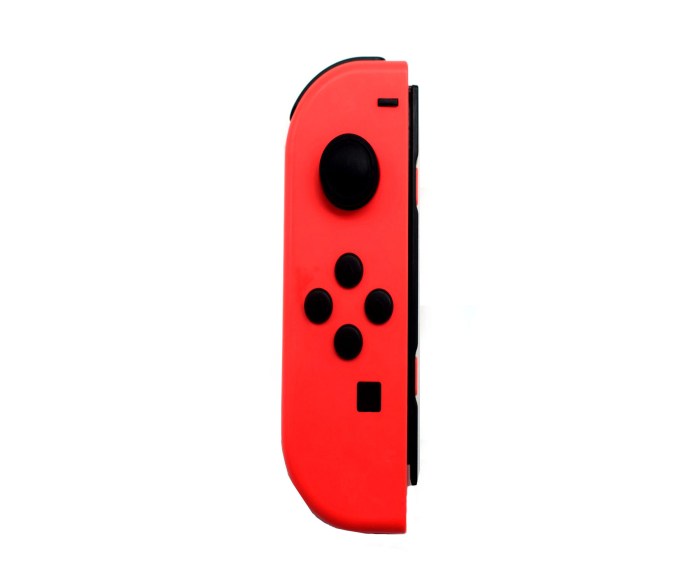
Joy-Con Controller Anatomy and Functionality
The Nintendo Switch Joy-Con controllers are marvels of miniaturization, packing a surprising amount of technology into a compact design. Understanding their inner workings is crucial to comprehending the root causes of drift and other common issues. This section delves into the intricate mechanisms of the left Joy-Con, focusing on components directly related to analog stick functionality and button input.A detailed examination of the left Joy-Con reveals a complex interplay of components.
These parts are meticulously engineered to translate physical input from the user’s hand into digital signals that the console can interpret. Failures within these systems can manifest as input drift, unresponsive buttons, or other erratic behaviors.
Analog Stick Assembly
The analog stick, the heart of precise control, is a critical component susceptible to wear and tear. Its mechanical structure is intricate, designed to convert rotational motion into digital signals.
- The analog stick itself is a small, specialized lever. This lever is mounted on a small, spring-loaded shaft that moves within a housing. The shaft and its housing are key to ensuring smooth, consistent motion.
- Internal potentiometers are crucial for converting the stick’s position into an electrical signal. These potentiometers measure the precise angle and direction of the stick’s movement. Any damage or friction within the potentiometer mechanism can lead to drift.
- Connecting the analog stick to the circuit board are tiny wires and conductive paths. These paths carry the electrical signals from the potentiometers to the controller’s internal processor. Any break or damage in these connections can result in unpredictable input signals.
Button Assembly
The buttons on the Joy-Con, while seemingly simple, are sophisticated micro-switches. Their operation is critical for precise button presses and releases.
- Each button utilizes a micro-switch, a tiny mechanical component. This switch is designed to close a circuit when pressed and open it when released. The electrical signal generated during this process is sent to the circuit board for processing.
- The micro-switches are strategically placed on the circuit board. Their precise positioning and connections are crucial to ensure consistent signal transmission.
- Problems with the micro-switches, such as excessive dust or debris, can cause sticking, double-pressing, or non-responsive behavior.
Internal Components and Drift
Drift, a common symptom in Joy-Con controllers, often stems from issues within the analog stick’s potentiometer or the connections to the circuit board.
- Potentiometer wear and tear is a significant cause of drift. As the potentiometer wears, its ability to accurately measure the stick’s position degrades, leading to erratic inputs. This is especially true with repeated use and exposure to dust.
- Physical damage to the potentiometer’s internal components or the conductive paths can also cause drift. Accidental drops or impacts can lead to irreparable damage and cause drift.
- Corrosion or oxidation can also hinder the smooth operation of the potentiometers, resulting in inaccurate input readings and drift.
Input and Output Components
Identifying the key components responsible for input and output is crucial to understanding the source of control issues.
- The analog stick and its potentiometer assembly are the primary input components. They are responsible for translating the user’s physical input into digital signals.
- The micro-switches are another crucial input component, providing digital signals when a button is pressed or released.
- The circuit board receives and processes the signals from both the analog stick and the buttons. This board also sends signals to other parts of the controller for operation. This board acts as the central processing unit of the controller.
Visual Guide for Foam Application

Applying the right amount of foam to your Joy-Con controllers is crucial for a successful repair. Incorrect application can lead to either insufficient cushioning or excess foam, both of which compromise the controller’s functionality and longevity. This visual guide will detail the precise steps and demonstrate how to avoid common pitfalls. Following these steps ensures a reliable and long-lasting fix.Proper foam application is a critical step in repairing Joy-Con controllers.
This method, when followed correctly, minimizes the chance of controller malfunctions or further damage. The steps Artikeld here will help you achieve a professional-looking and functional repair.
Preparation for Foam Application
The first stage of the repair process involves thoroughly preparing the controller. This includes cleaning the affected area and ensuring a clean working environment. A clean surface is essential for optimal adhesion and prevents dust or debris from interfering with the foam’s placement.
- Controller Cleaning: Carefully clean the area where the foam will be applied. Use a soft cloth or brush to remove any dust, dirt, or previous adhesive residue. Isopropyl alcohol can be used for stubborn grime, but ensure the controller is thoroughly dried before proceeding.
- Surface Preparation: Ensure the area where the foam will be placed is completely dry and free from any contaminants. This is crucial for a strong bond between the foam and the controller. Any moisture will compromise the adhesive properties of the foam.
Applying the Foam: Step-by-Step
Applying the foam correctly is essential for a successful repair. Improper application can lead to issues like foam slippage or uneven pressure points, affecting the controller’s functionality.
- Precise Placement: Carefully measure and position the foam piece according to the area of the controller that needs cushioning. Use a ruler or similar tool to ensure accurate alignment and size. The foam should be placed where the controller shows noticeable play or wobble.
- Gentle Pressure: Apply gentle but even pressure to the foam piece, ensuring it adheres firmly to the controller. Avoid applying excessive pressure that might distort the foam or damage the controller’s surface. Use your fingers to smooth the foam onto the controller to eliminate air pockets.
- Adhesive Application (if applicable): If the foam has an adhesive backing, apply it according to the manufacturer’s instructions. Avoid applying excessive pressure that might damage the controller’s surface. Ensure the adhesive adheres completely and evenly to the controller.
- Checking for Air Pockets: Carefully inspect the foam for any trapped air pockets. If any are present, gently use a tool or your finger to smooth them out. Air pockets can compromise the foam’s effectiveness and lead to discomfort.
Avoiding Common Mistakes
Understanding and avoiding common mistakes is key to a successful repair.
- Over-application: Excessive foam can create a loose fit, potentially causing the controller to feel too soft or even affect its functionality. This can also increase the likelihood of the foam becoming displaced during use.
- Improper Placement: Incorrect placement can result in uneven pressure points or reduced effectiveness of the cushioning. Always verify the foam’s position to ensure it’s in the precise area where it’s needed.
- Insufficient Foam: Insufficient foam may not provide adequate cushioning, leading to continued issues with the controller’s movement. Ensure the foam is sized appropriately for the specific area needing repair.
Epilogue
In conclusion, fixing a drifting Nintendo Switch Joy-Con controller left stick using foam is often a cost-effective and DIY-friendly solution. While alternative repairs exist, understanding the intricacies of the Joy-Con, the various foam types, and the detailed application process is key to achieving long-lasting results. This guide provides a comprehensive resource to help you diagnose, repair, and maintain your Joy-Cons for optimal gaming experiences.
We hope this guide helps you on your repair journey.